


Yoto Mini Teardown and Rescue
Yesterday my daughter’s Yoto mini took a dunk in the bathtub. She was devastated, she uses it almost constantly. So it was Dad to the rescue. The device was straight forward to take apart, but I wanted to share how I did it so that other parents don’t have to figure it out on the fly.
1. Getting In
First things first, remove the rubber feet on the bottom of the Yoto. Once you have the screws removed you can peel the case apart into two pieces. There are two catches on the sides of the case that I used a iFixIt guitar picks. The top felt like it wasn’t going to come off, but I gave it a little bit of a pull and it worked just fine.
2. Remove the Battery
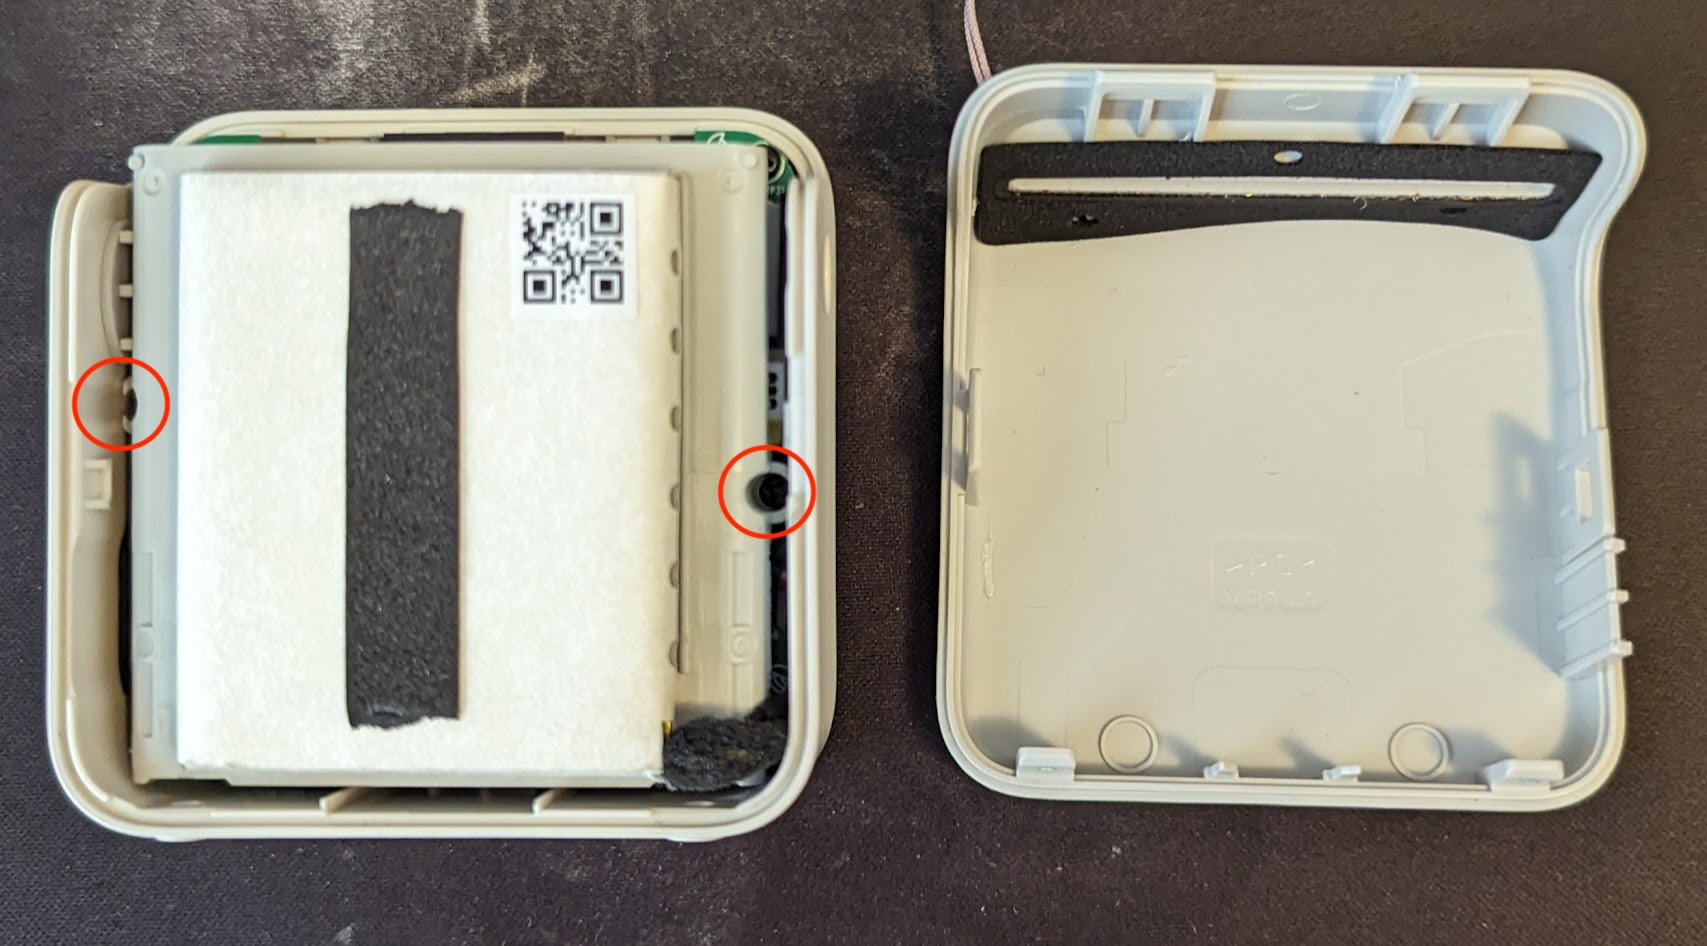
Once I had the case open I needed to remove the battery pack that sits on top of the other internals. This was a little snug to get into so you will need a screwdriver with a longer narrow shank on it.
Once you have the screws removed you should be able to pull the battery away from the rest of the Yoto internals. Be careful! The battery and the wifi antenna are connected to the PCB and their connectors are glued in place. I did not attempt to separate the battery from the rest of the body of the player.
Once you can see the PCB, you’ll see that there are 4 screws that connect the PCB to the front of the player. I removed those, but didn’t need to. When in doubt try to leave screws in place. I had hoped to get down a layer further, but it wasn’t clear how the board could be removed without getting into more complicated maneuvers with the charging port, the headphone jack, power button, and the two dials on the front.
3. Blow dry
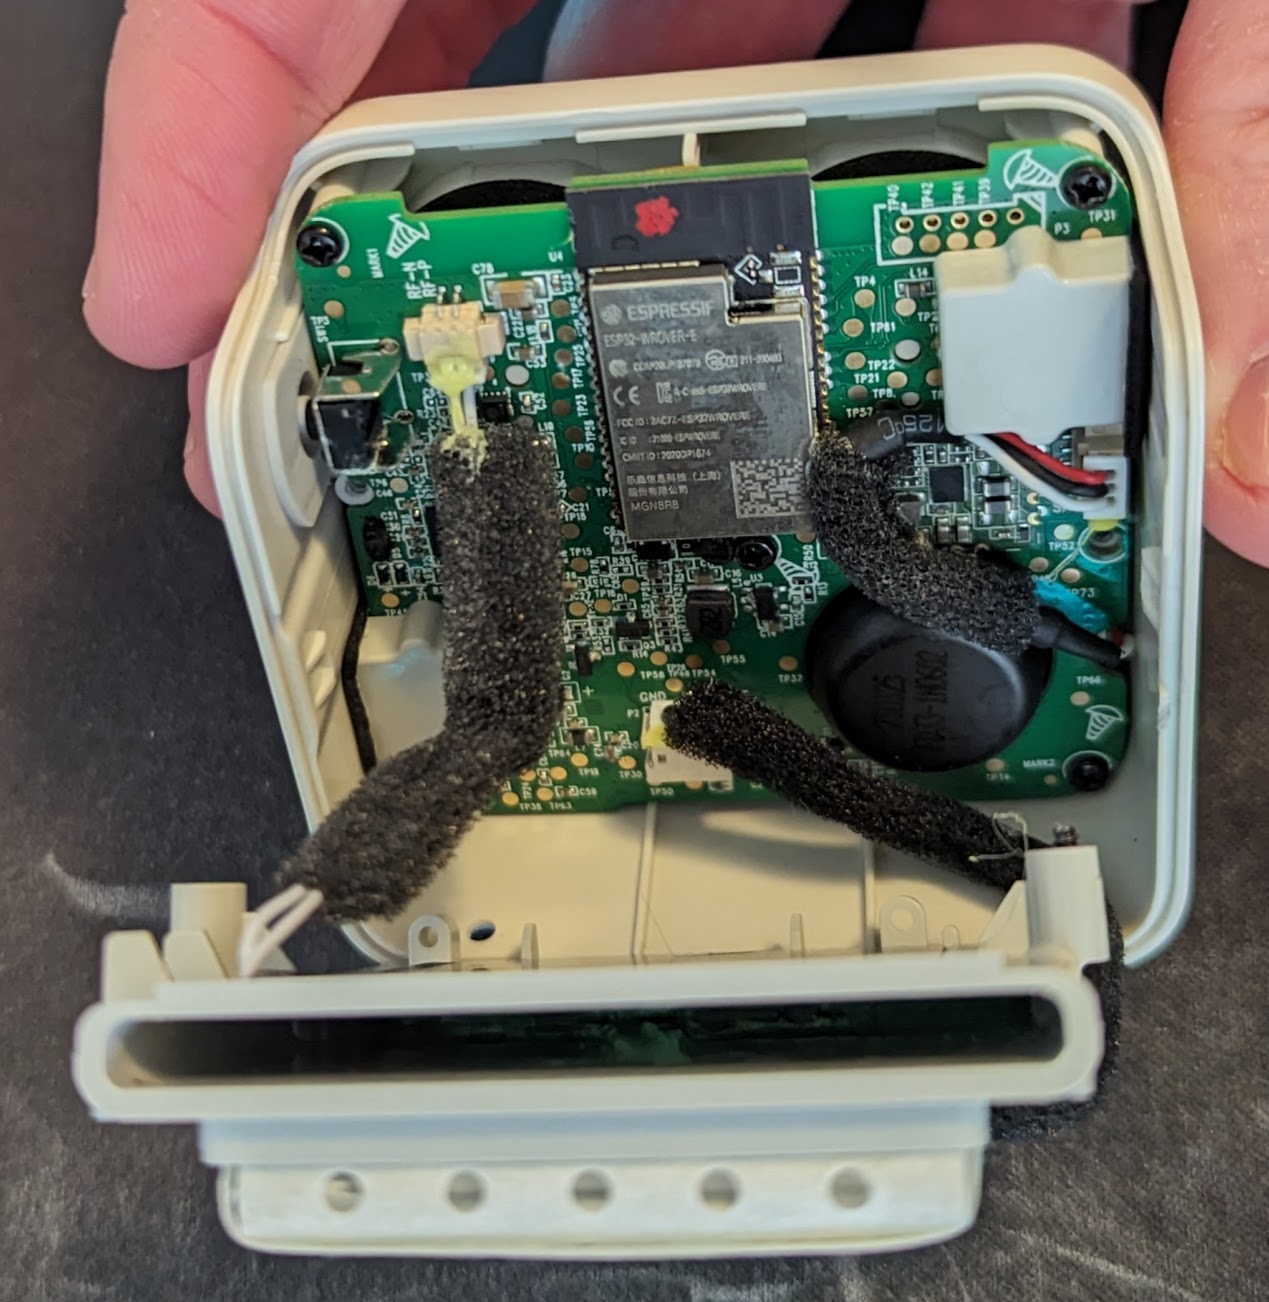
The internals of the yoto mini including the PCB and the cable connecting to the battery and wifi antenna.
At this point I spent 20-30 minutes with a blowdryer on low heat blowing into the guts of the Yoto. I was trying to displace as much water as I could and I was particularly paying attention to the water I could see in the small display on the front.
After I had pushed a lot of air through I left the Yoto open and on my desk to continue to air out and dry overnight. In the morning I pushed the power button, everything turned on and I reassembled everything in reverse order.
Notes
I probably got particularly lucky that this had a very brief submersion. The paper around the battery pack was still dry when I pulled everything apart. That gave me more confidence that I could hand this back to my 6yo to play with and not worry about the battery exploding. If it was wet for longer, I might have more reservations or try to look at the battery more closely for signs of damage.